Photographing the dark sky always sounded very complicated. Here I will explain you the camera settings I use, so can photograph the milky way too.
For anyone starting with a camera, photographing the milky way sounds like the final test before graduation. Well, once you know the camera settings you need for photographing the milky way, you will see it is not as difficult as it sounds. After reading this piece, I´m sure you will be able to take a shot at it yourself.
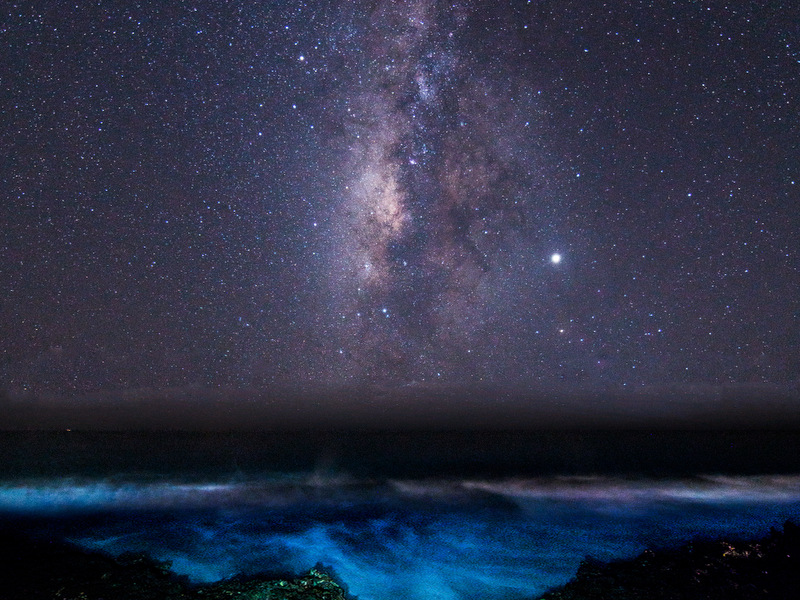
There is nothing as fascinating and beautiful as admiring a starry sky. It makes us realize how small we are and how many different worlds we are not able to see yet. Over the years photographers have been able to show us what our eyes can not see and with the increase in hobby photographers taking out their cameras to find the perfect shot, the milky way has become the holy grail of photography.
Although the best travel photographers use very expensive equipment and spend lots of resources on finding the best spots on earth to photograph, any person with a standard camera, a tripod and a regular lens can give it a try, too.
Here is a step by step guide on which camera settings I use when I photograph the milky way and how to bring the dark sky to life.
Camera Equipment
Your camera equipment plays the biggest role when it comes to photographing the milky way. In contrast to other branches of photography, in astrophotography it is actually true that the better and more expensive the camera, the better the picture quality you will get. However, this shouldn´t stop you from trying your best with the equipment you have.
This is the basic equipment you need:
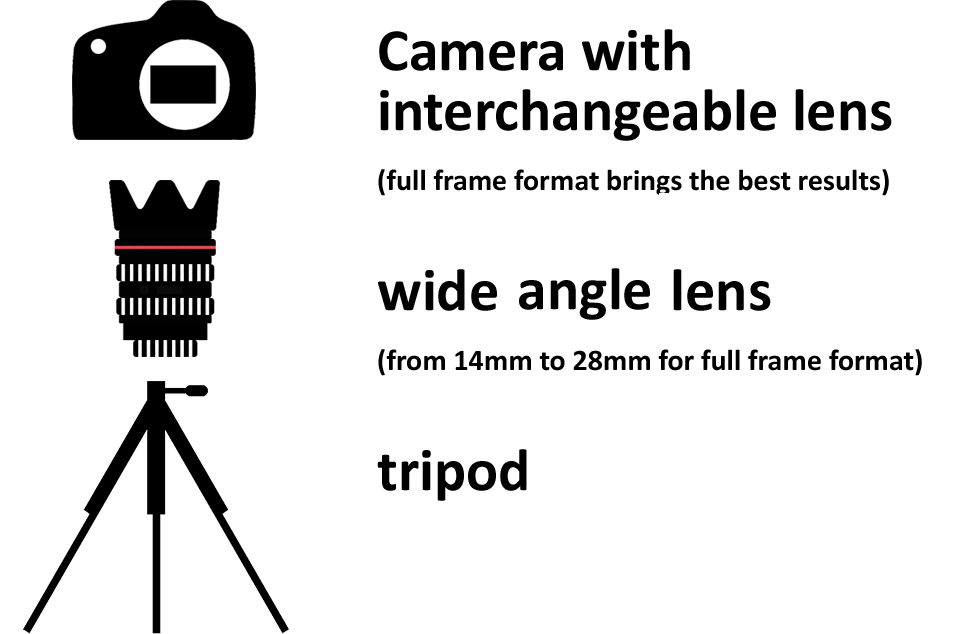
Which camera should I use for photographing the milky way? It’s not about the brand or model of your camera, the most important factor is how large the sensor is that you are using. In case you don’t know your sensor size, here you will find you more about sensor sizes and which models have what size.
NOTE: In case you forget your tripod (happened to me a lot), you can photograph leaving your camera on a steady ground and use the camera self-timer or an external shutter release. The problem with this is the lack of flexibility to find the perfect composition.
Remember: You need to keep the camera completely steady for at least 15 seconds.
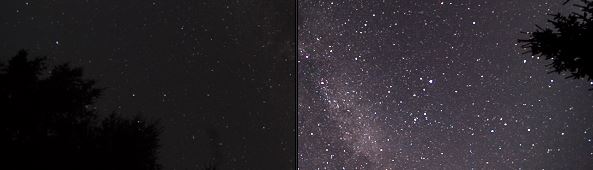
You don’t have a full frame camera? Don´t worry, you can also take photos with APS-C, APS-H and even MFT sensor cameras. However, you will get a lot of noise in your photographs when you are shooting at higher ISOs.
Read more: Is AI going to change photography forever?
Read more: How to improve your travel photography with a drone
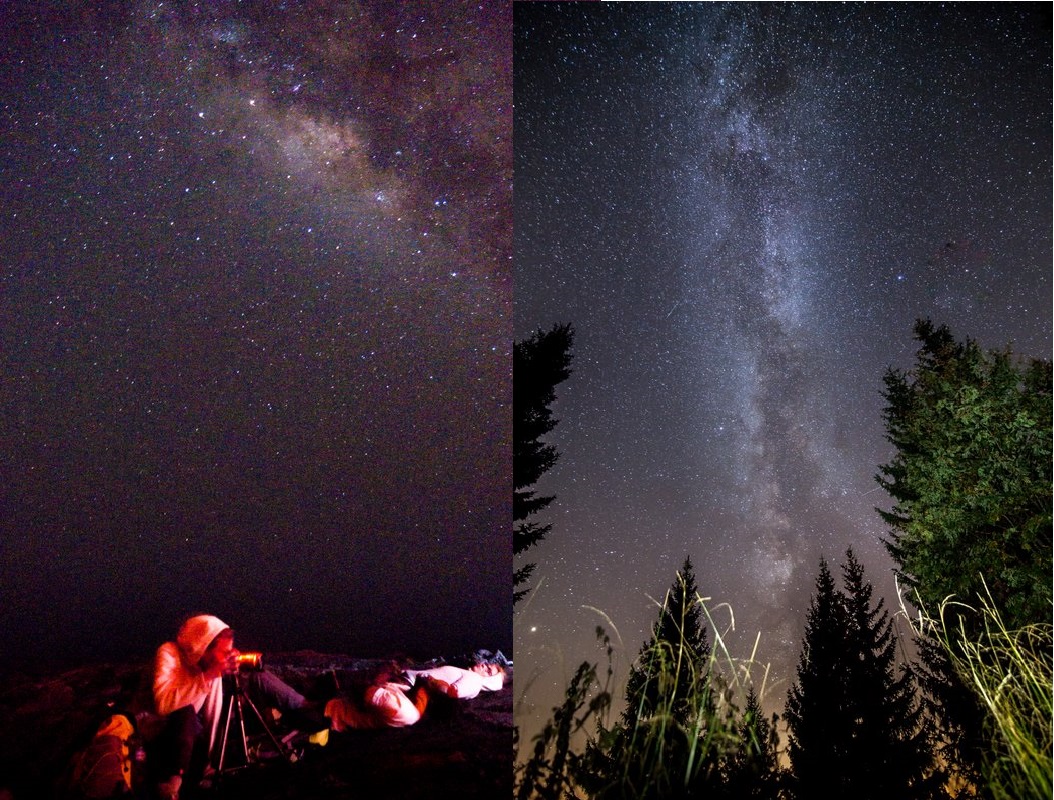
Do you see the amount of noise in the left photograph?
Milky way camera settings

Every photographer has their preferred camera settings when it comes to photographing the milky way and the dark sky. In my opinion instead of just using some standard settings it’s important that you fully understand the terms aperture, shutter speed and ISO. When you are photographing in manual mode (M-mode) you will be able to manually control these three settings. Make sure you know exactly how increasing and decreasing each one of these will affect your final photograph.
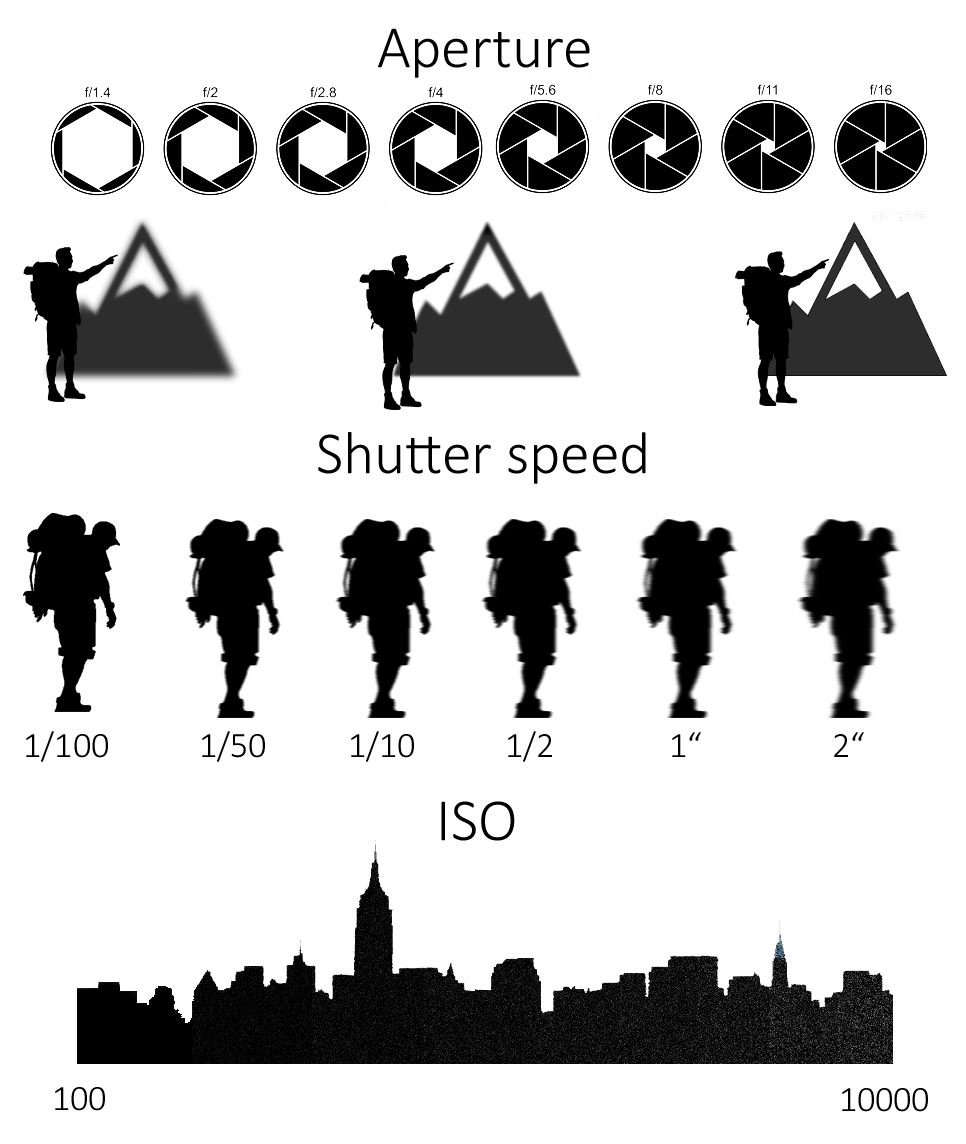
Simple right? Now you just need to find the perfect balance between these three elements and create a sharp photograph without much noise. However, it´s not that simple when it comes to the dark sky. When photographing the milky way, light conditions are extremely poor and the rotation of the earth causes star trailing.
Photographers increase the ISO as much as possible and use a small aperture (f stop) in order to achieve the right balance between light going into your sensor and noise. No matter which sensor size camera you are using you need to start photographing with a very high ISO – 1200-1600 is a good start. Exposure must be long enough. 10-25 seconds will create a good photo without much star trailing and keeping the aperture between f2,8 – f4,2 should be enough to get a very good, sharp result. Then try increasing your ISO in small steps and play with the exposure time until you find the settings that satisfy what you are looking for.
Can´t focus on the milky way? Turn off the auto focus and use manual focusing to find the milky way. Focus on the farthest length possible and do a couple of test shots to see if the stars are sharp enough. The lower the f-stop you use, the more difficult it will be to focus.

Which camera settings I use when photographing the milky way?
With my full frame camera and a 16mm f2,8 lens, I personally start photographing the milky way using the following camera settings:
ISO 1200-3200
Shutter Speed 10-15 seconds
Aperture f2,8 – f3,5
Within these ranges I test which setting best suits the environment and external light. This is usually just the start of a long set of tryouts until I get the photo I want.
Read more: Tips to photograph the northern lights in Iceland
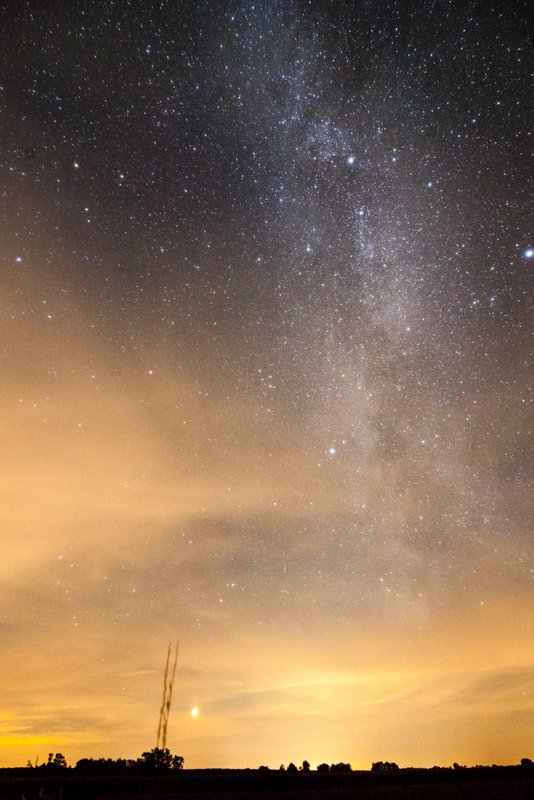
Sensor: Full Frame
Exposure: 15s
Aperture: f3,5
ISO: 1600
Courtesy: Maximilian Weinzierl
Composition
There is not a good photo without a good composition. Any photo of the milky way has a beauty in itself, but there are elements you can add to your photograph that create a unique result.
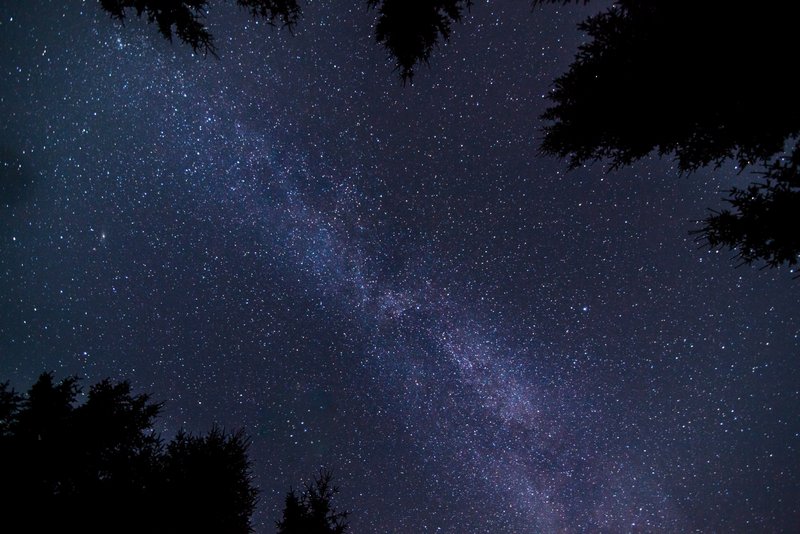
Sensor size: Full Frame
Exposure: 15s
Aperture: f3,5
ISO: 1250
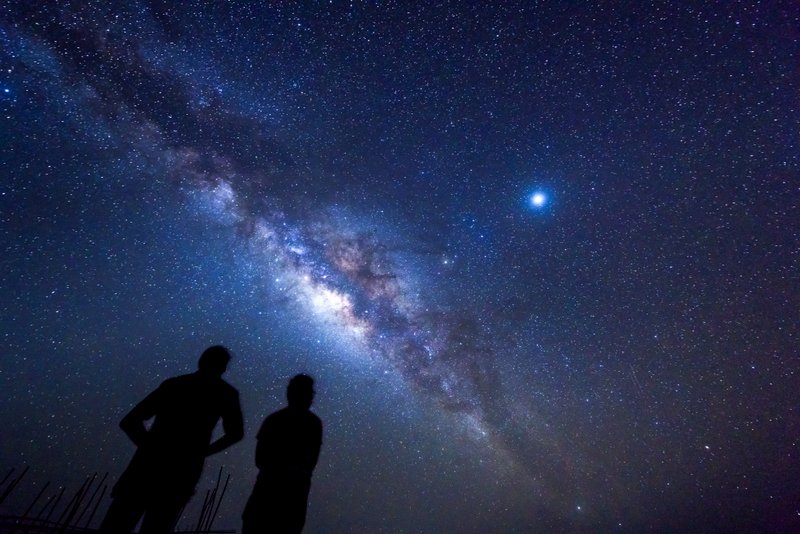
People, additional lights, natural landscapes or objects can make the real difference when you see your photograph later. Be creative!
INSIDER TIP: It´s too dark to see what your composition looks like? Take a photo with the highest ISO and a shutter speed of 1 second. You will get a bad but quick view of the composition you have in front of you.
Sensor size: Full Frame
Exposure: 20s
Aperture: f3,5
ISO: 1600
In order to photograph the milky way you need to far away from any city. Otherwise, pollution in the air will always be present and instead of capturing beautiful dark tones and the contrast to the shiny stars, you will have a yellow filter in front of your photograph.
Any sign of light will affect the photograph and, believe it or not, little details like a street light and even the moon light will create enough light to completely damage an otherwise perfect photograph.
INSIDER TIP: Apps like Star Tracker and Sky Map will help you track the milky way, any other constellation and the moon. Use these free apps to track when the moon will be out of the picture and what will be the best time to photograph the milky way.
Postprocessing
You won´t find a photographer who publishes a photo of the milky way without going through postprocessing. This is a topic we can talk about for hours. Using a software for photo editing is absolutely necessary and although I don´t want to go into details, I´m going to show you the most important changes I do in the picture.
Exposure: Although we photographed with a very long exposure, increasing the exposure even more in the postprocessing will bring up more detail that was not visible to the naked eye.
White Balance: This option helps you correct the color of the sky. Do you want a rather yellowish sky or a dark blue one?
Contrast: The milky way is characterized by its high contrast of colors. Increasing the amount of contrast will create these colorful tones you see in many photographs.
Noise reduction: You are generating a lot of noise when photographing at high ISO. Noise reduction is very useful to erase those little grains in the photograph.
NOTE: Make sure you are photographing in RAW format. This type of format holds more information about the photograph and you will be able to adjust your values way better during postprocessing.
Are you ready to go out and take some shots?
Read more: Photographing the milky way in Jamaica